Appearance
Customers
The Customers section is your boutique's customer directory — add new customers, track their appointments and orders, manage party members, save payment methods, and keep detailed notes.
Customer List
The main Customers page shows a searchable, paginated table of all your customers.
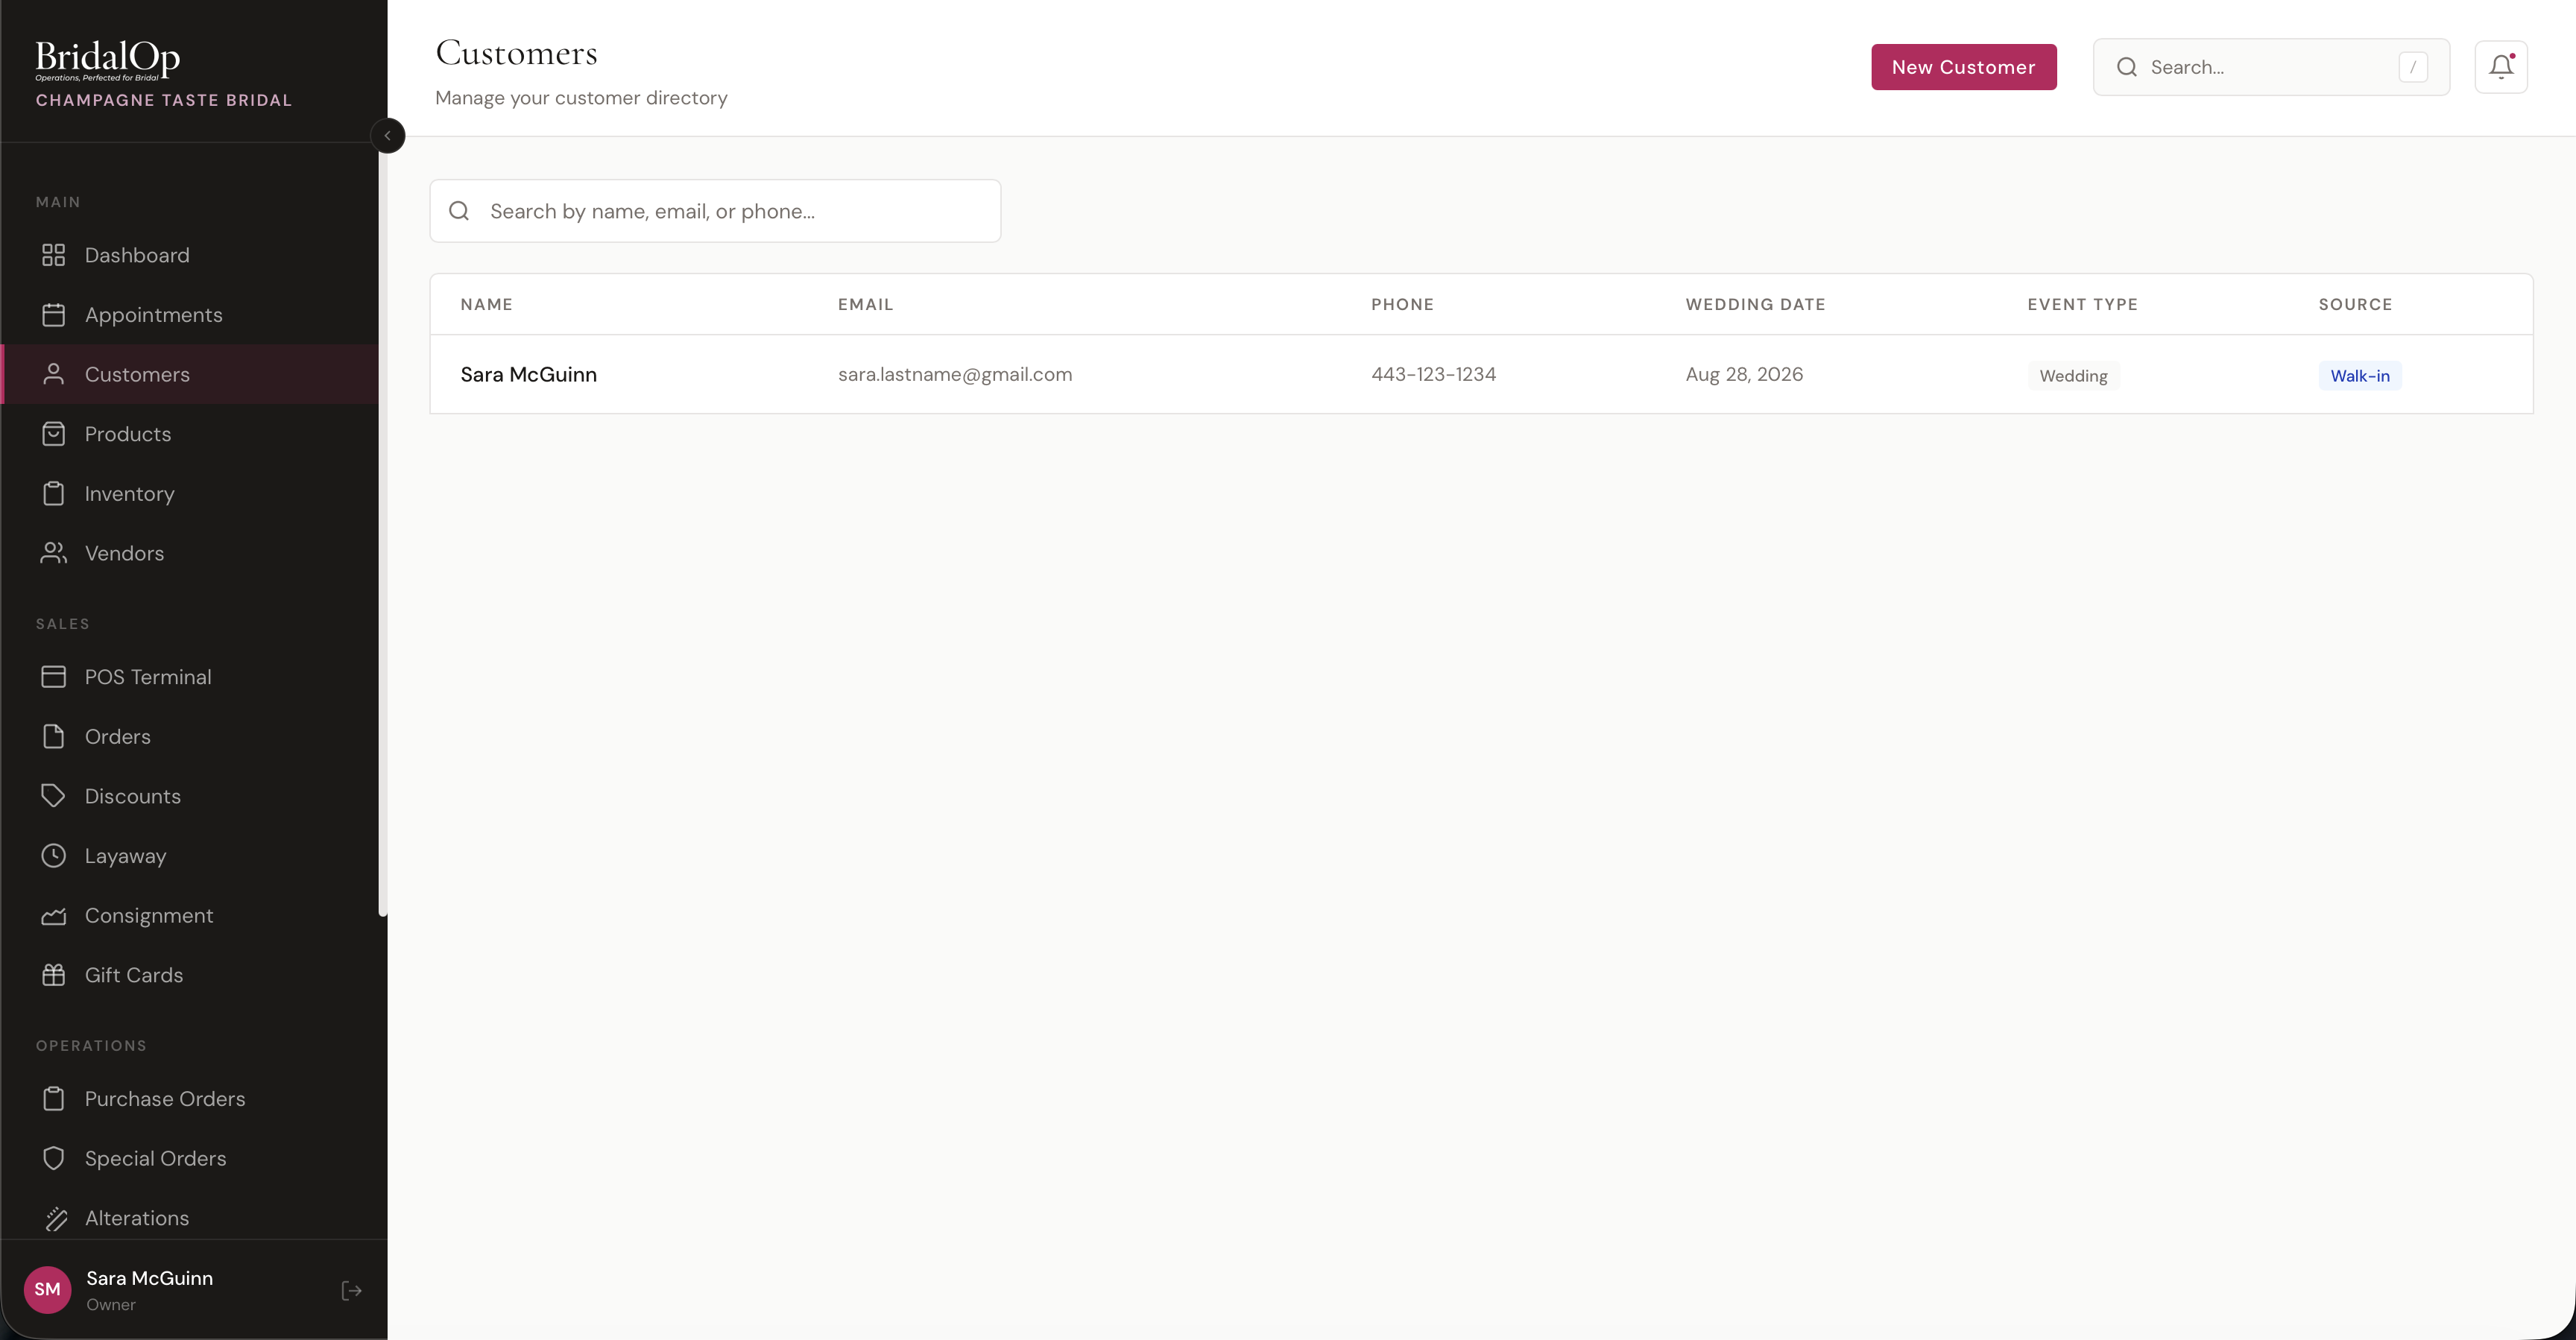
Table Columns
| Column | Description |
|---|---|
| Name | First and last name (click to open customer profile) |
| Customer email address | |
| Phone | Phone number |
| Wedding Date | Event date |
| Event Type | Badge showing Wedding, Prom, Quinceanera, etc. |
| Source | How the customer found you — pulled from your editable customer source list |
Search
Type in the search bar to filter customers in real-time. Search matches across first name, last name, email, and phone. Results update as you type with a brief delay to keep things responsive.
Pagination
The list displays 25 customers per page with numbered page navigation at the bottom.
Adding a New Customer
Click New Customer to open the creation form.
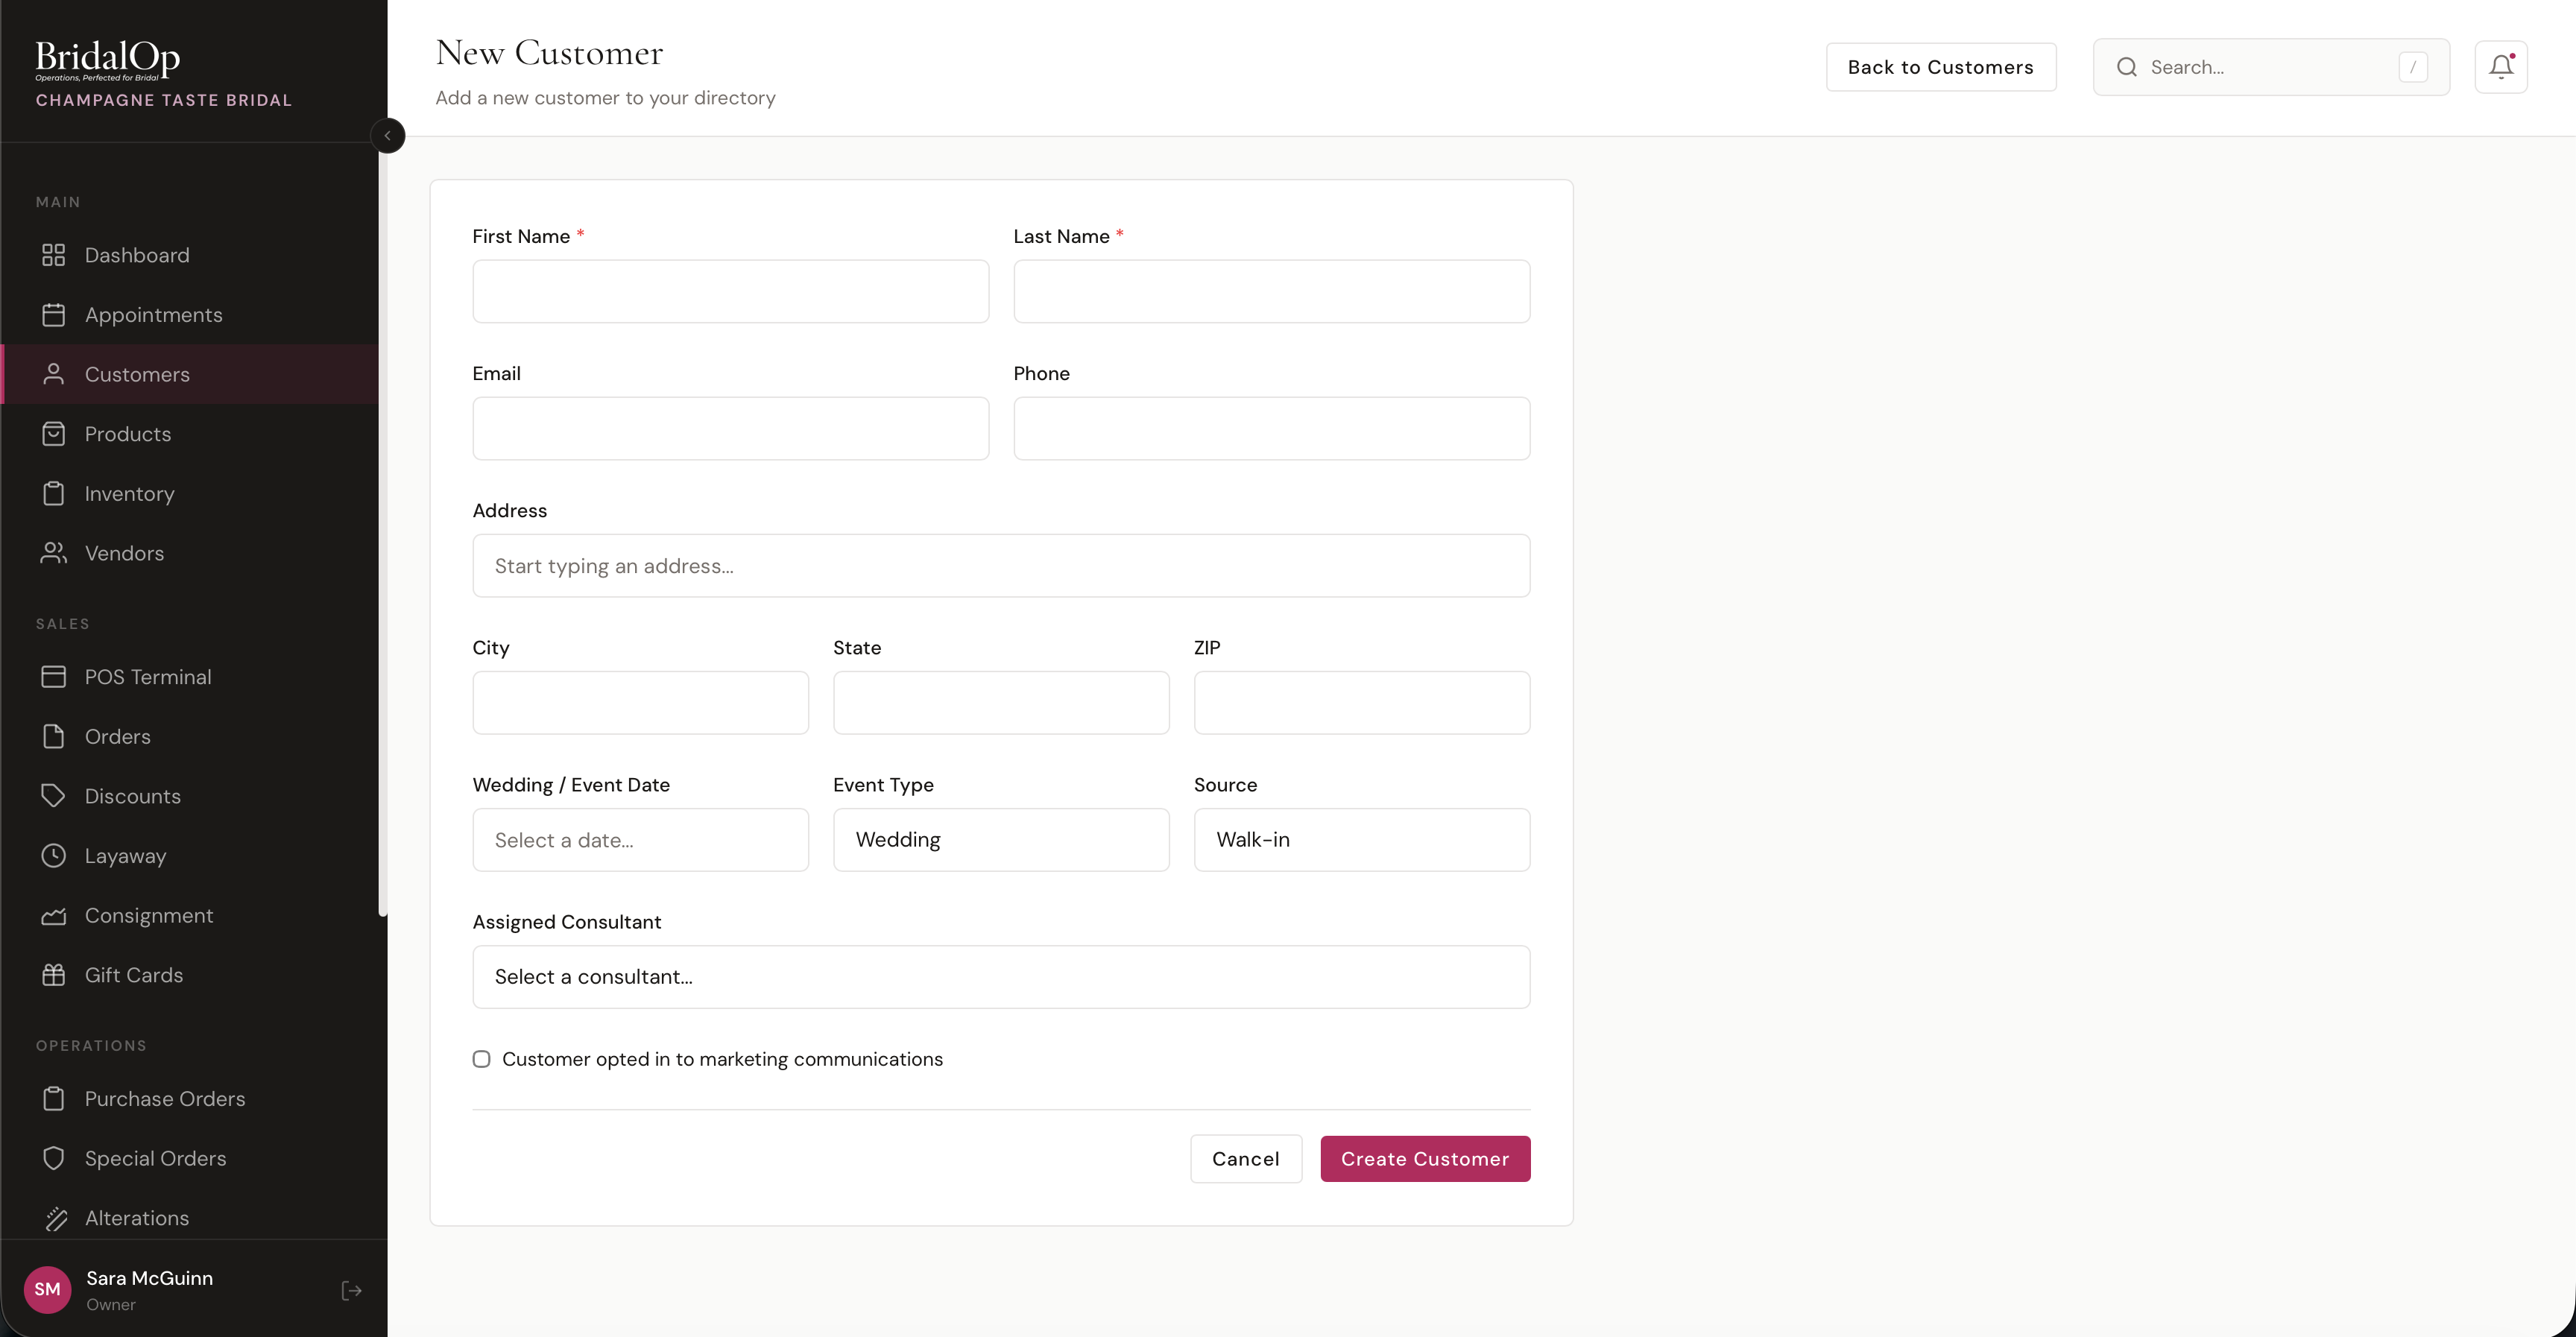
Form Fields
Required:
- First Name
- Last Name
Contact Information:
- Phone
- Address — with autocomplete (start typing to get suggestions)
- City, State, ZIP
Event Details:
- Wedding / Event Date — date picker
- Event Type — Wedding (default), Prom, Quinceanera, Mother of Bride, Bridesmaid, or Other
- Source — how the customer found you, chosen from your boutique's editable source list
Assignment & Preferences:
- Assigned Consultant — assign a team member to this customer
- Marketing Opt-in — checkbox for marketing communications consent
After saving, you're taken directly to the new customer's profile page.
Customer Source
The Source field records how a customer found you, and it's fully editable — you manage the list of options yourself under Settings → Customer Sources. Add, rename, reorder, or remove entries so the choices match how your boutique actually gets customers (Walk-in, Referral, Instagram, Bridal show, a specific ad campaign, and so on).
This same list powers the "How did you hear about us?" question on your public booking form, so a customer's booking answer flows straight through to their profile source — no separate list to maintain. When a customer books and answers that question, their source is set automatically (unless they already have one).
Source also drives the Customers by Source breakdown in reporting, so keeping the list clean and consistent gives you an accurate picture of which channels bring in business.
Klaviyo leads: Customers created automatically from your Klaviyo lead flow are given the source Klaviyo and tagged lead, so you can tell at a glance which records came in from marketing versus in-store.
Customer Profile
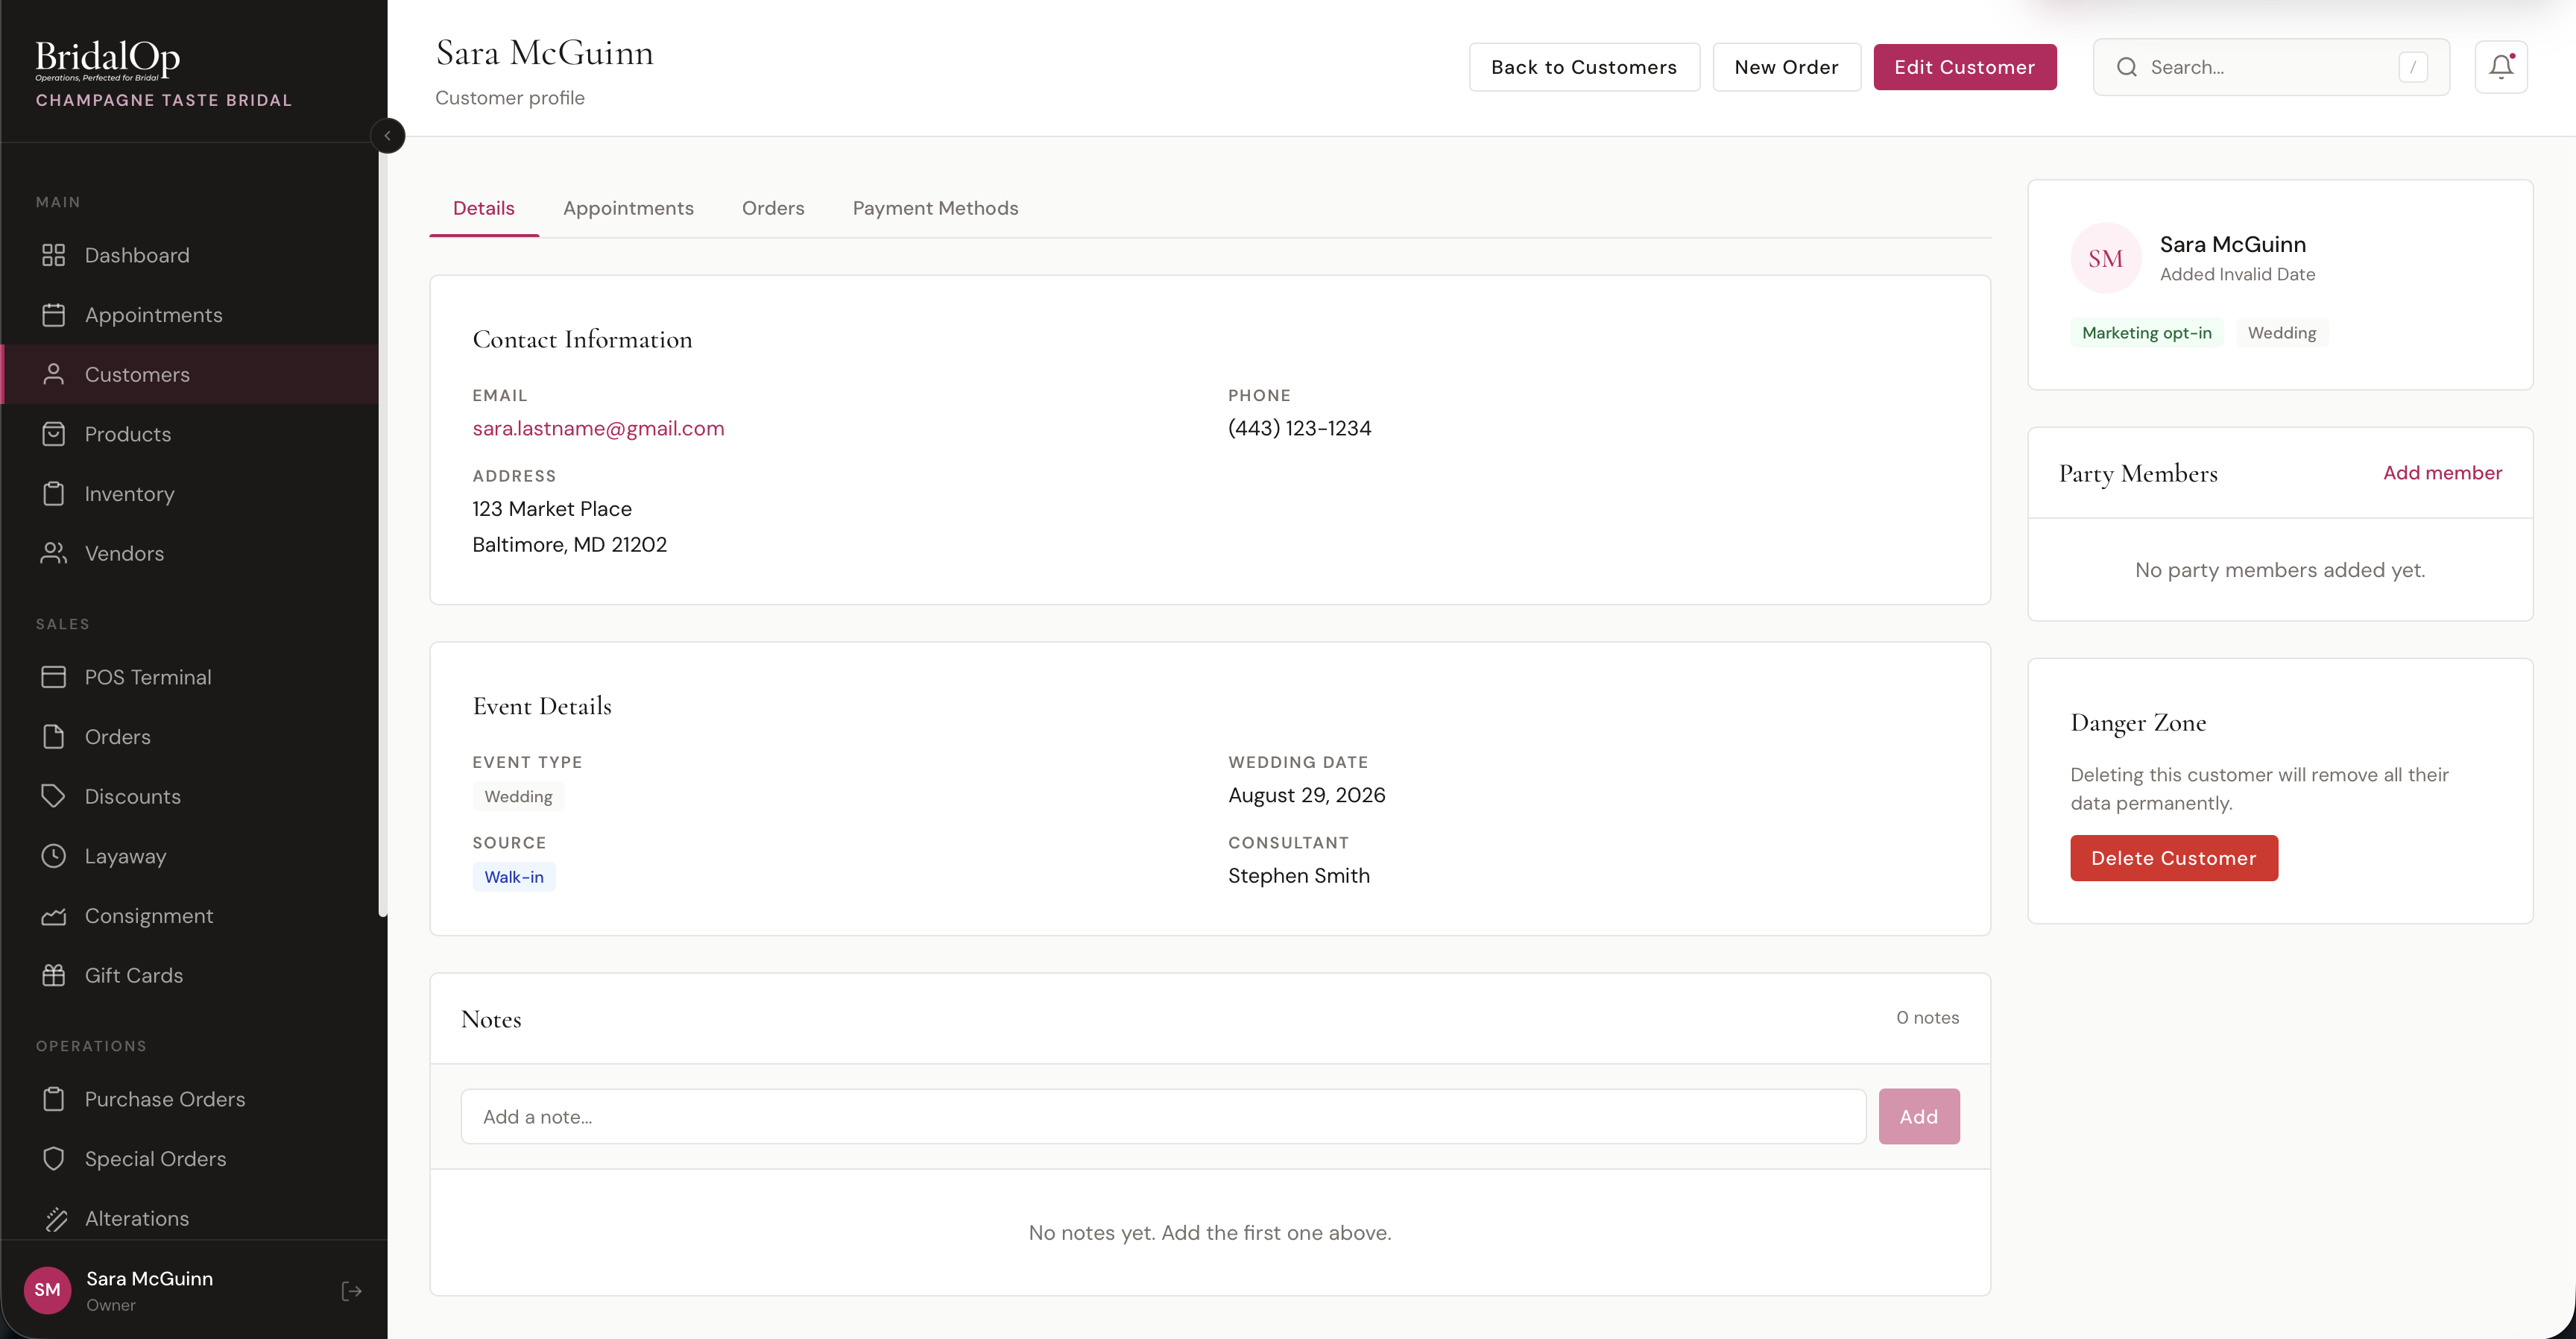
Click any customer in the list to open their profile. The page is split into a main content area with tabs and a sidebar with quick info.
Details Tab
The default tab shows:
Contact Information — email (click to copy), formatted phone number, and full address.
Event Details — event type, wedding/event date, source, and assigned consultant.
Notes — a timeline of internal notes about this customer. Add notes by typing in the text box and clicking Add. Each note shows who wrote it and when (e.g., "Sara McGuinn — 2 hours ago"). Notes can be deleted individually.
Profile Tab
View and edit the customer's personal details — name, email, phone, address, wedding date, event type, source, and assigned consultant.
Appointments Tab
A table of all appointments for this customer, showing:
- Date and time
- Appointment type
- Consultant assigned
- Status badge (Confirmed, Pending, Completed, Cancelled, No-Show)
Click any appointment to open its detail panel for editing.
Orders Tab
A table of all orders for this customer:
- Order number (e.g., ORD-20260403-0001)
- Date created
- Type of order
- Staff who created it
- Total amount
- Status badge
Click any order to view its full details.
Invoices Tab
A table of all invoices for this customer — view invoice number, total, paid amount, balance due, status, and due date. Click any invoice to open it. This is a quick way to see a customer's full invoice history without searching through the main Invoices list.
Contracts Tab
View any contracts or policy agreements associated with this customer.
Favorites Tab
Track which products a customer is interested in — a wish list that doubles as a shortcut to the POS.
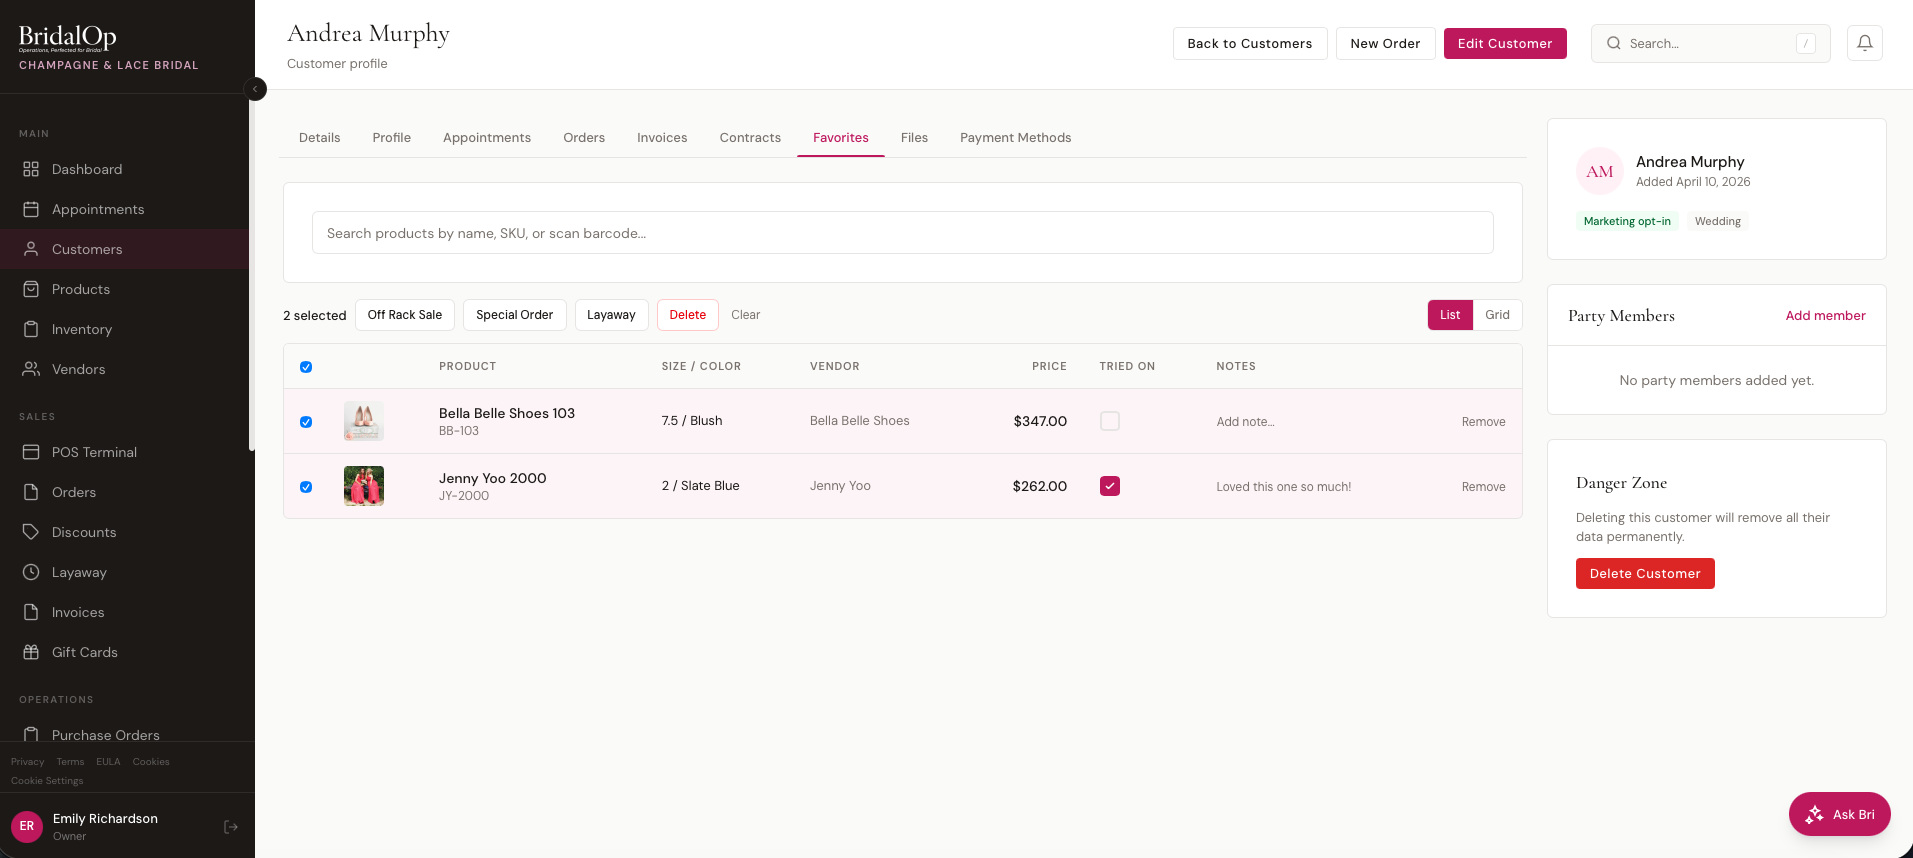
Adding favorites: Use the search bar at the top to find products by name, SKU, or barcode. Click a result to add it. If the product has multiple variants (sizes/colors), a picker appears so you can select the specific one. Duplicate product + variant combinations are prevented.
List and Grid views: Toggle between List (table layout) and Grid (card layout with larger images) using the buttons in the top-right.
List view columns:
| Column | Description |
|---|---|
| Product | Product image, name, and SKU |
| Size / Color | Variant details |
| Vendor | Product vendor |
| Price | Selling price |
| Tried On | Checkbox to mark items the customer has physically tried on during fittings |
| Notes | Click to add or edit per-item notes (e.g., "Loved this one!", fit adjustments needed) |
Tried On: Click the checkbox to toggle — useful for tracking what was tried during appointments so you know what's left to show. Updates instantly.
Notes: Click the notes field on any favorite to type a note (up to 1,000 characters). Press Enter to save.
Bulk actions: Select one or more favorites and use the action bar:
| Action | What It Does |
|---|---|
| Off Rack Sale | Creates a draft order and opens the POS with those items already in the cart |
| Special Order | Creates a draft special order and opens the POS |
| Layaway | Creates a draft layaway order and opens the POS |
| Delete | Remove selected favorites |
When you click a sale action, BridalOp creates a draft order with line items for each selected favorite, reserves any linked inventory for 30 minutes, and redirects you straight to the POS Terminal — ready to check out with no manual product searching.
Click Clear to deselect all without taking action, or Remove on individual rows to remove a single favorite.
Communications Tab
View a complete log of every email and SMS message sent to this customer from BridalOp — appointment confirmations, order receipts, invoice reminders, layaway alerts, and more.
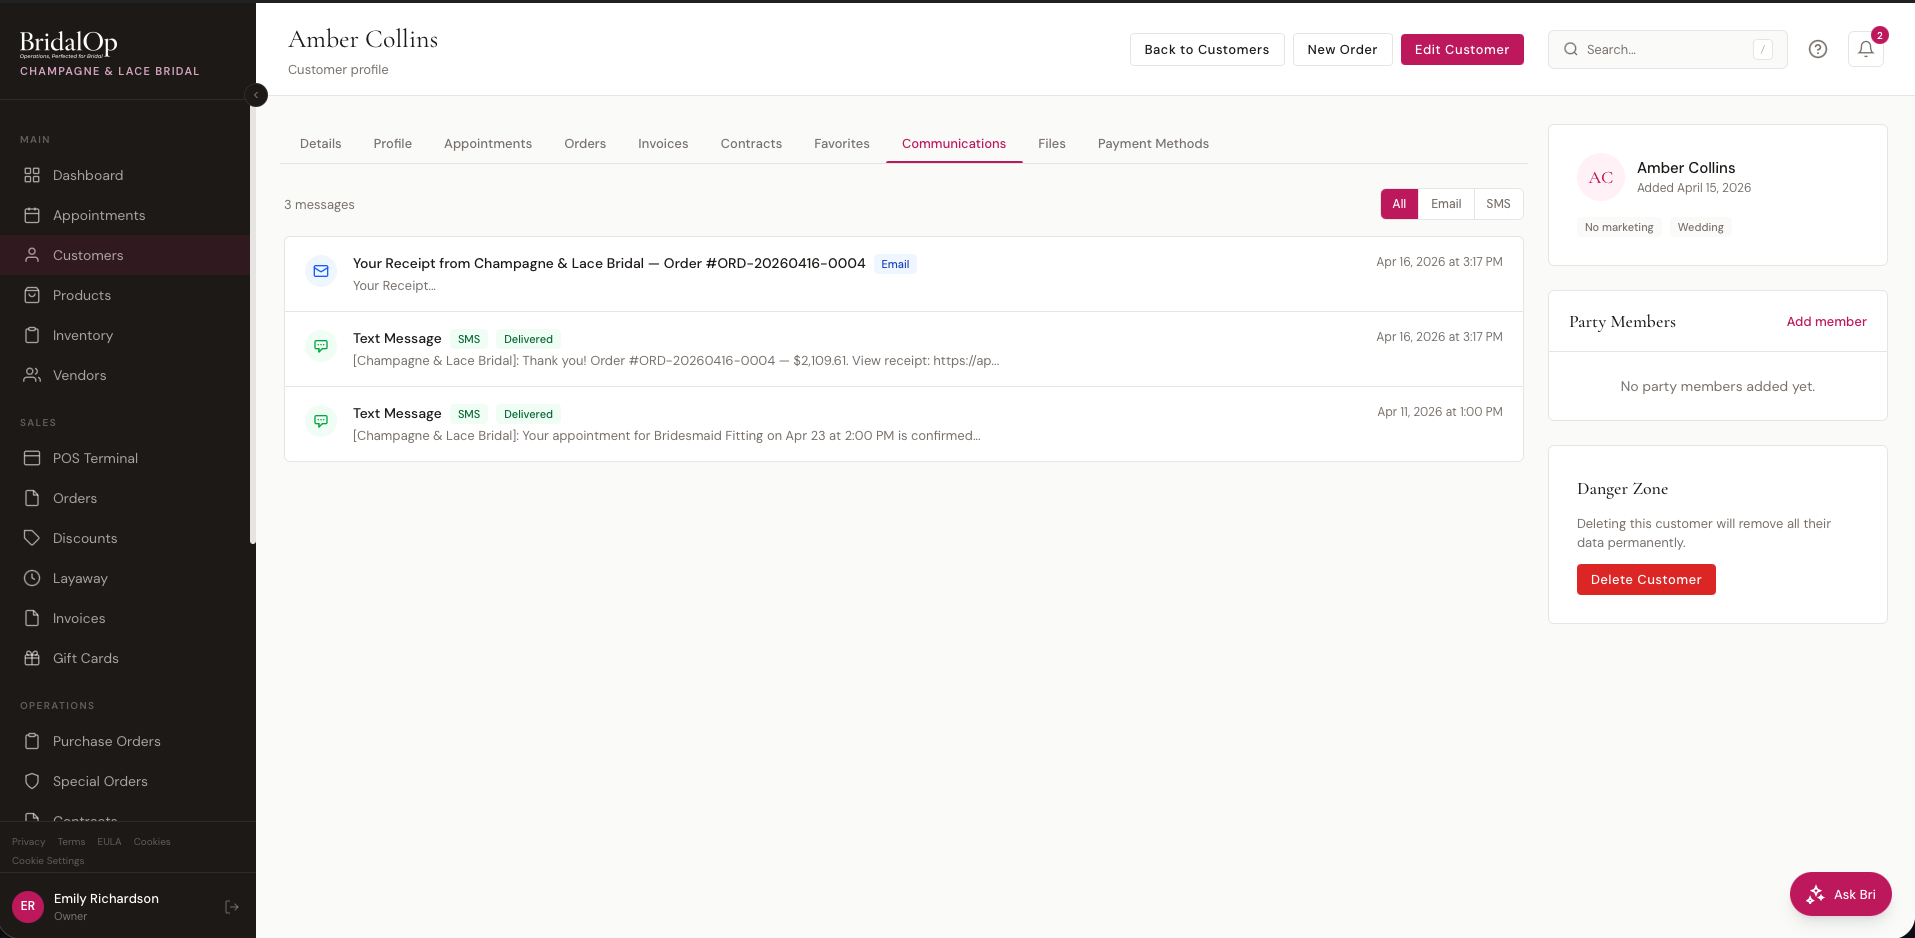
The list shows a total message count and each message with:
- Icon — email (envelope) or SMS (chat bubble)
- Subject / Message — the email subject line or SMS text preview
- Type badge — Email or SMS
- Status badge — Delivered, Sent, Failed, etc. (SMS only)
- Date and time sent
Use the filter buttons in the top-right to show All, Email only, or SMS only.
Click any message to expand its full content. For emails, this shows the rendered HTML email exactly as the customer received it:
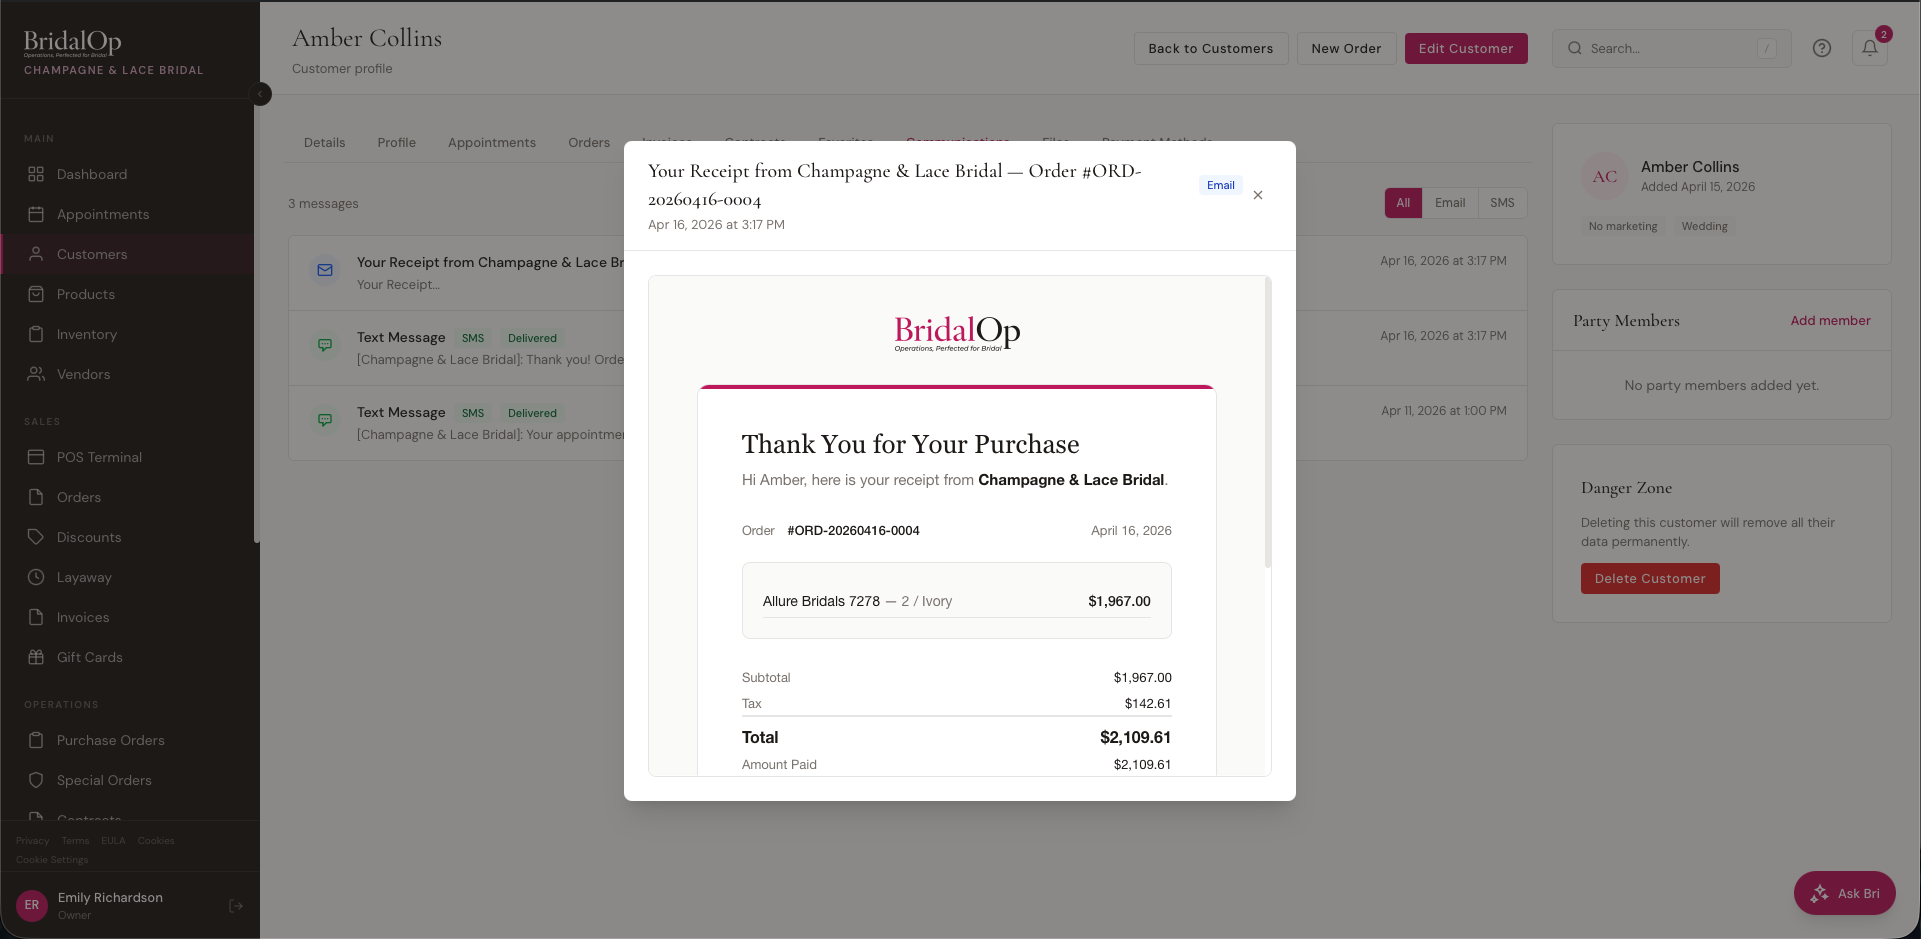
This is useful for verifying what a customer received, troubleshooting delivery issues, or checking the content of a receipt or reminder.
Files Tab
Upload and manage files attached to a customer's profile — photos, measurement sheets, inspiration images, or any other documents.
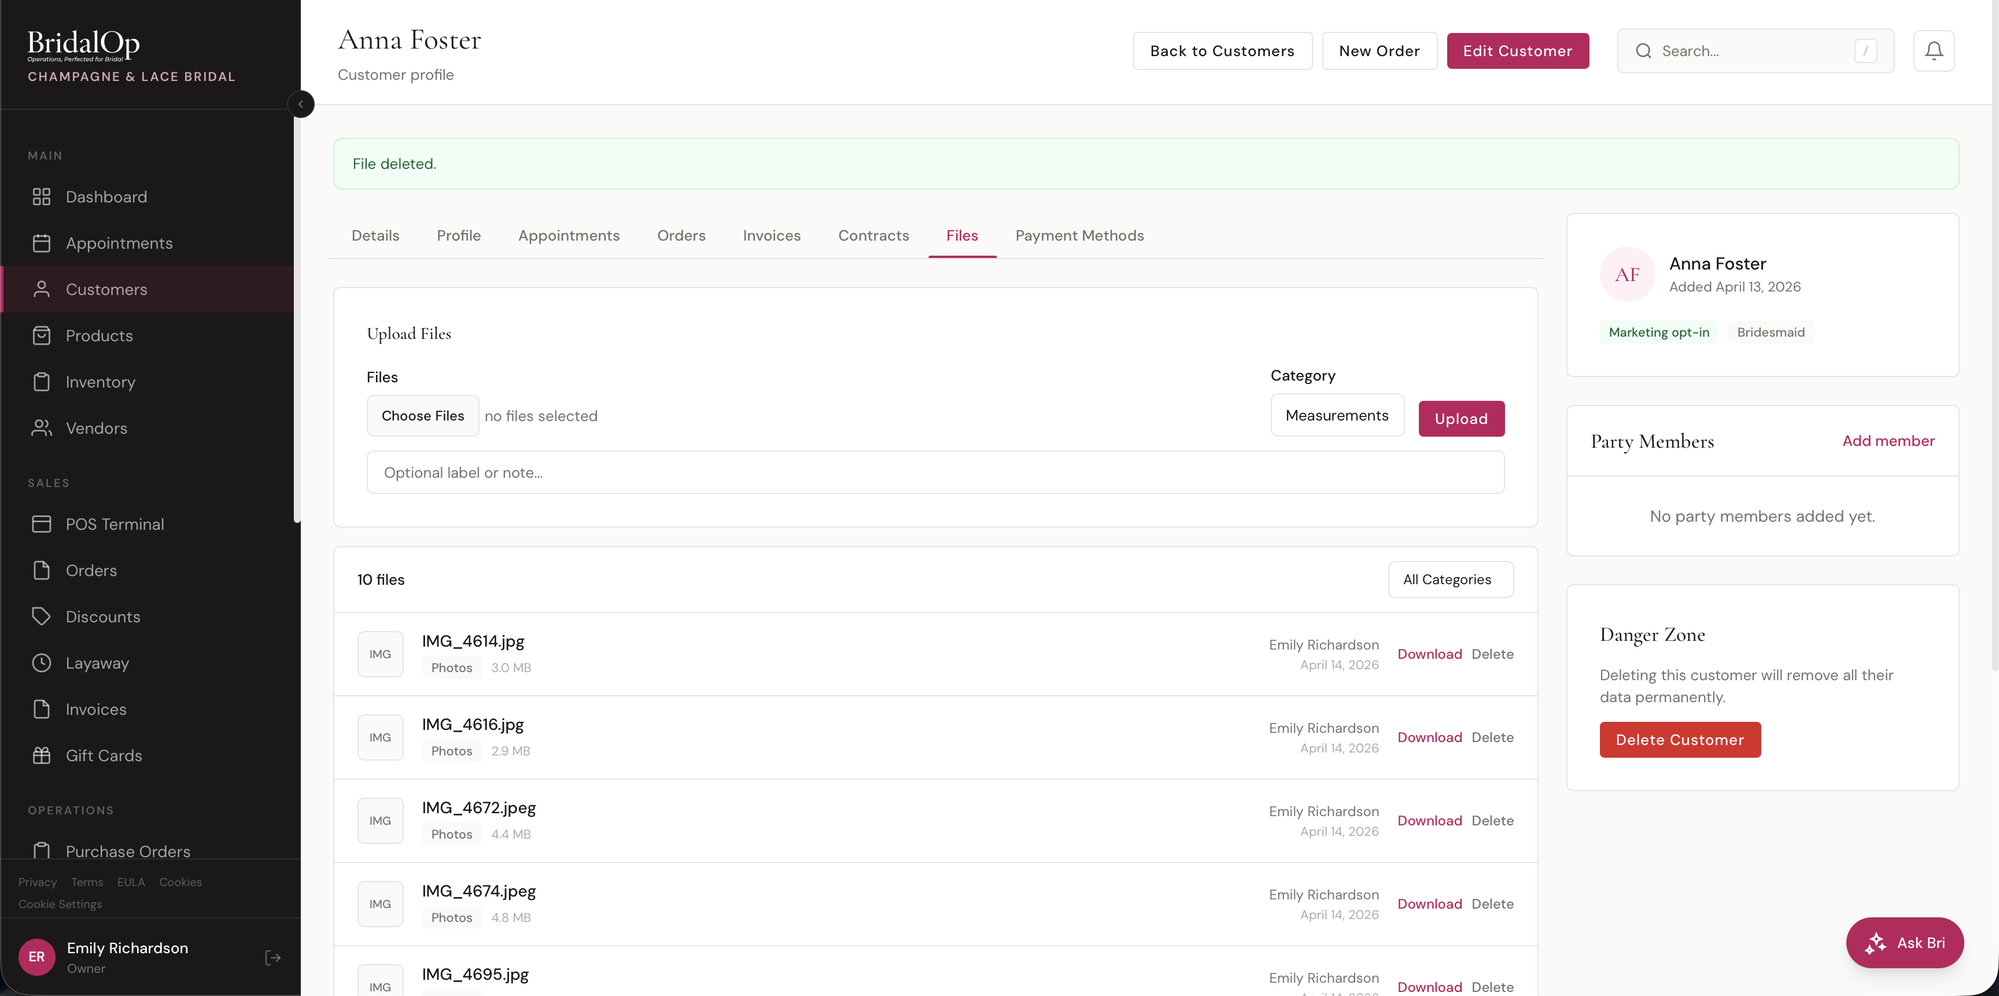
To upload, click Choose Files, select a Category, add an optional label or note, and click Upload. You can upload up to 10 files at a time, with a maximum of 10 MB per file.
Available categories: Photos, Contracts, Measurements, Insurance, Inspiration, Internal Documents, Other.
Each file shows the filename, size, category, who uploaded it, and when. Use the All Categories dropdown to filter files by category. Click Download to save a file or Delete to remove it.
Internal Documents
The Internal Documents category is for staff-only files attached to a customer — vendor purchase orders, designer invoices, supplier contracts, anything that shouldn't ever reach the customer.
Access is gated by a single permission: customer-files.internal. By default Owner and Manager roles have it; you can grant or revoke it for any other role under Settings > Roles & Permissions.
For users without the permission:
- The Internal Documents option is hidden from the upload category dropdown
- The Internal Documents option is hidden from the All Categories filter dropdown
- Internal documents are filtered out of the file list entirely
- Direct upload, download, or delete attempts (e.g., guessing a URL) return 403 Forbidden
Enforcement is server-side, so the gate holds even if someone manipulates the UI.
Forms Tab
Send custom questionnaires to a customer and review their responses. Forms are built once under Settings > Customer Forms and can include short text, long text, single/multi-select, checkbox, image upload, and a bridal-specific Style Preferences composite field.
Sending a form: Click Send Form to open a modal listing every active form template. Pick one and confirm — BridalOp sends both an email and an SMS to the customer with a unique tokenized link valid for 30 days.
The tab lists every form ever sent to this customer with a status pill:
| Status | Meaning |
|---|---|
| Pending | Sent but not yet submitted, link still valid |
| Submitted | Customer completed and submitted the form |
| Expired | 30 days passed without a submission |
Click any row to open the submission view. Pending rows show the form definition plus a Resend Form button to re-trigger the notifications. Submitted rows show each question with the customer's answer, with uploaded images displayed inline.
Payment Methods Tab
View and manage saved payment cards for layaway auto-charges and quick POS payments.
Each saved card shows:
- Card brand and last 4 digits (e.g., "Visa ****4242")
- Expiration date
- Gateway badge (Stripe or Square)
- Default indicator
From here you can:
- Add a new card — supports both Stripe and Square
- Set a card as default — used for automatic layaway charges
- Remove a card
How Cards Land Here
Cards arrive on this tab from a few different paths:
- Paid appointments — whenever a customer pays a deposit or full appointment price at booking, BridalOp automatically saves that card to the customer's profile. No setting required.
- Free appointments — only saves a card when Card on file for free appointments is enabled under Settings > Booking. Useful for reducing no-shows on consultations.
- Invoice payments — cards used to pay invoices through the public payment link are saved automatically.
- Manually added by staff via this tab.
Sidebar
The right sidebar includes:
Quick Info — avatar with initials, full name, date added, marketing opt-in status, and event type.
Party Members — track the bridal party or group. Each member has a name and role:
| Role | Label |
|---|---|
| bride | Bride |
| maid_of_honor | Maid of Honor |
| bridesmaid | Bridesmaid |
| mother | Mother |
| other | Other |
Click Add to add a party member, or remove them individually.
Danger Zone — delete the customer permanently. This removes all associated notes, party members, saved cards, appointments, and orders.
Editing a Customer
Click Edit Customer from the profile page to update any field. The edit form has the same fields as the creation form, pre-filled with current values.
Emailing a Customer
Click Email Customer from the profile to send the customer an email directly from BridalOp. This opens a compose modal where you can:
- Start from a template — pick any of your active email templates to pre-fill the subject and body, or start from a blank message.
- Write freely — edit the subject and compose the body in a rich-text editor.
- Insert merge tags — drop in tokens like
{{customer.first_name}}or{{customer.email}}, which are resolved to this customer's details before sending.
The message is wrapped in your boutique's branded email layout — the same one used for automated emails — so one-off emails look consistent with everything else the customer receives. Replies go to your boutique's email address.
Every email sent this way is logged to the customer's Communications tab, so you have a record of exactly what was sent and when.
The button is disabled if the customer has no email address on file.
Quick Actions from Profile
- New Order — opens the POS terminal pre-loaded with this customer
- Email Customer — opens the branded compose modal (see Emailing a Customer)
- Edit Customer — opens the edit form
- Back to Customers — returns to the customer list