Appearance
Customer Fields
Add custom fields to every customer profile to capture information specific to your boutique — wedding colors, dress preferences, fabric sensitivities, referral codes, or anything else you want to track.
Go to Settings > Customer Fields to manage them.
Adding a Custom Field
Click Add Field to open the creation page.
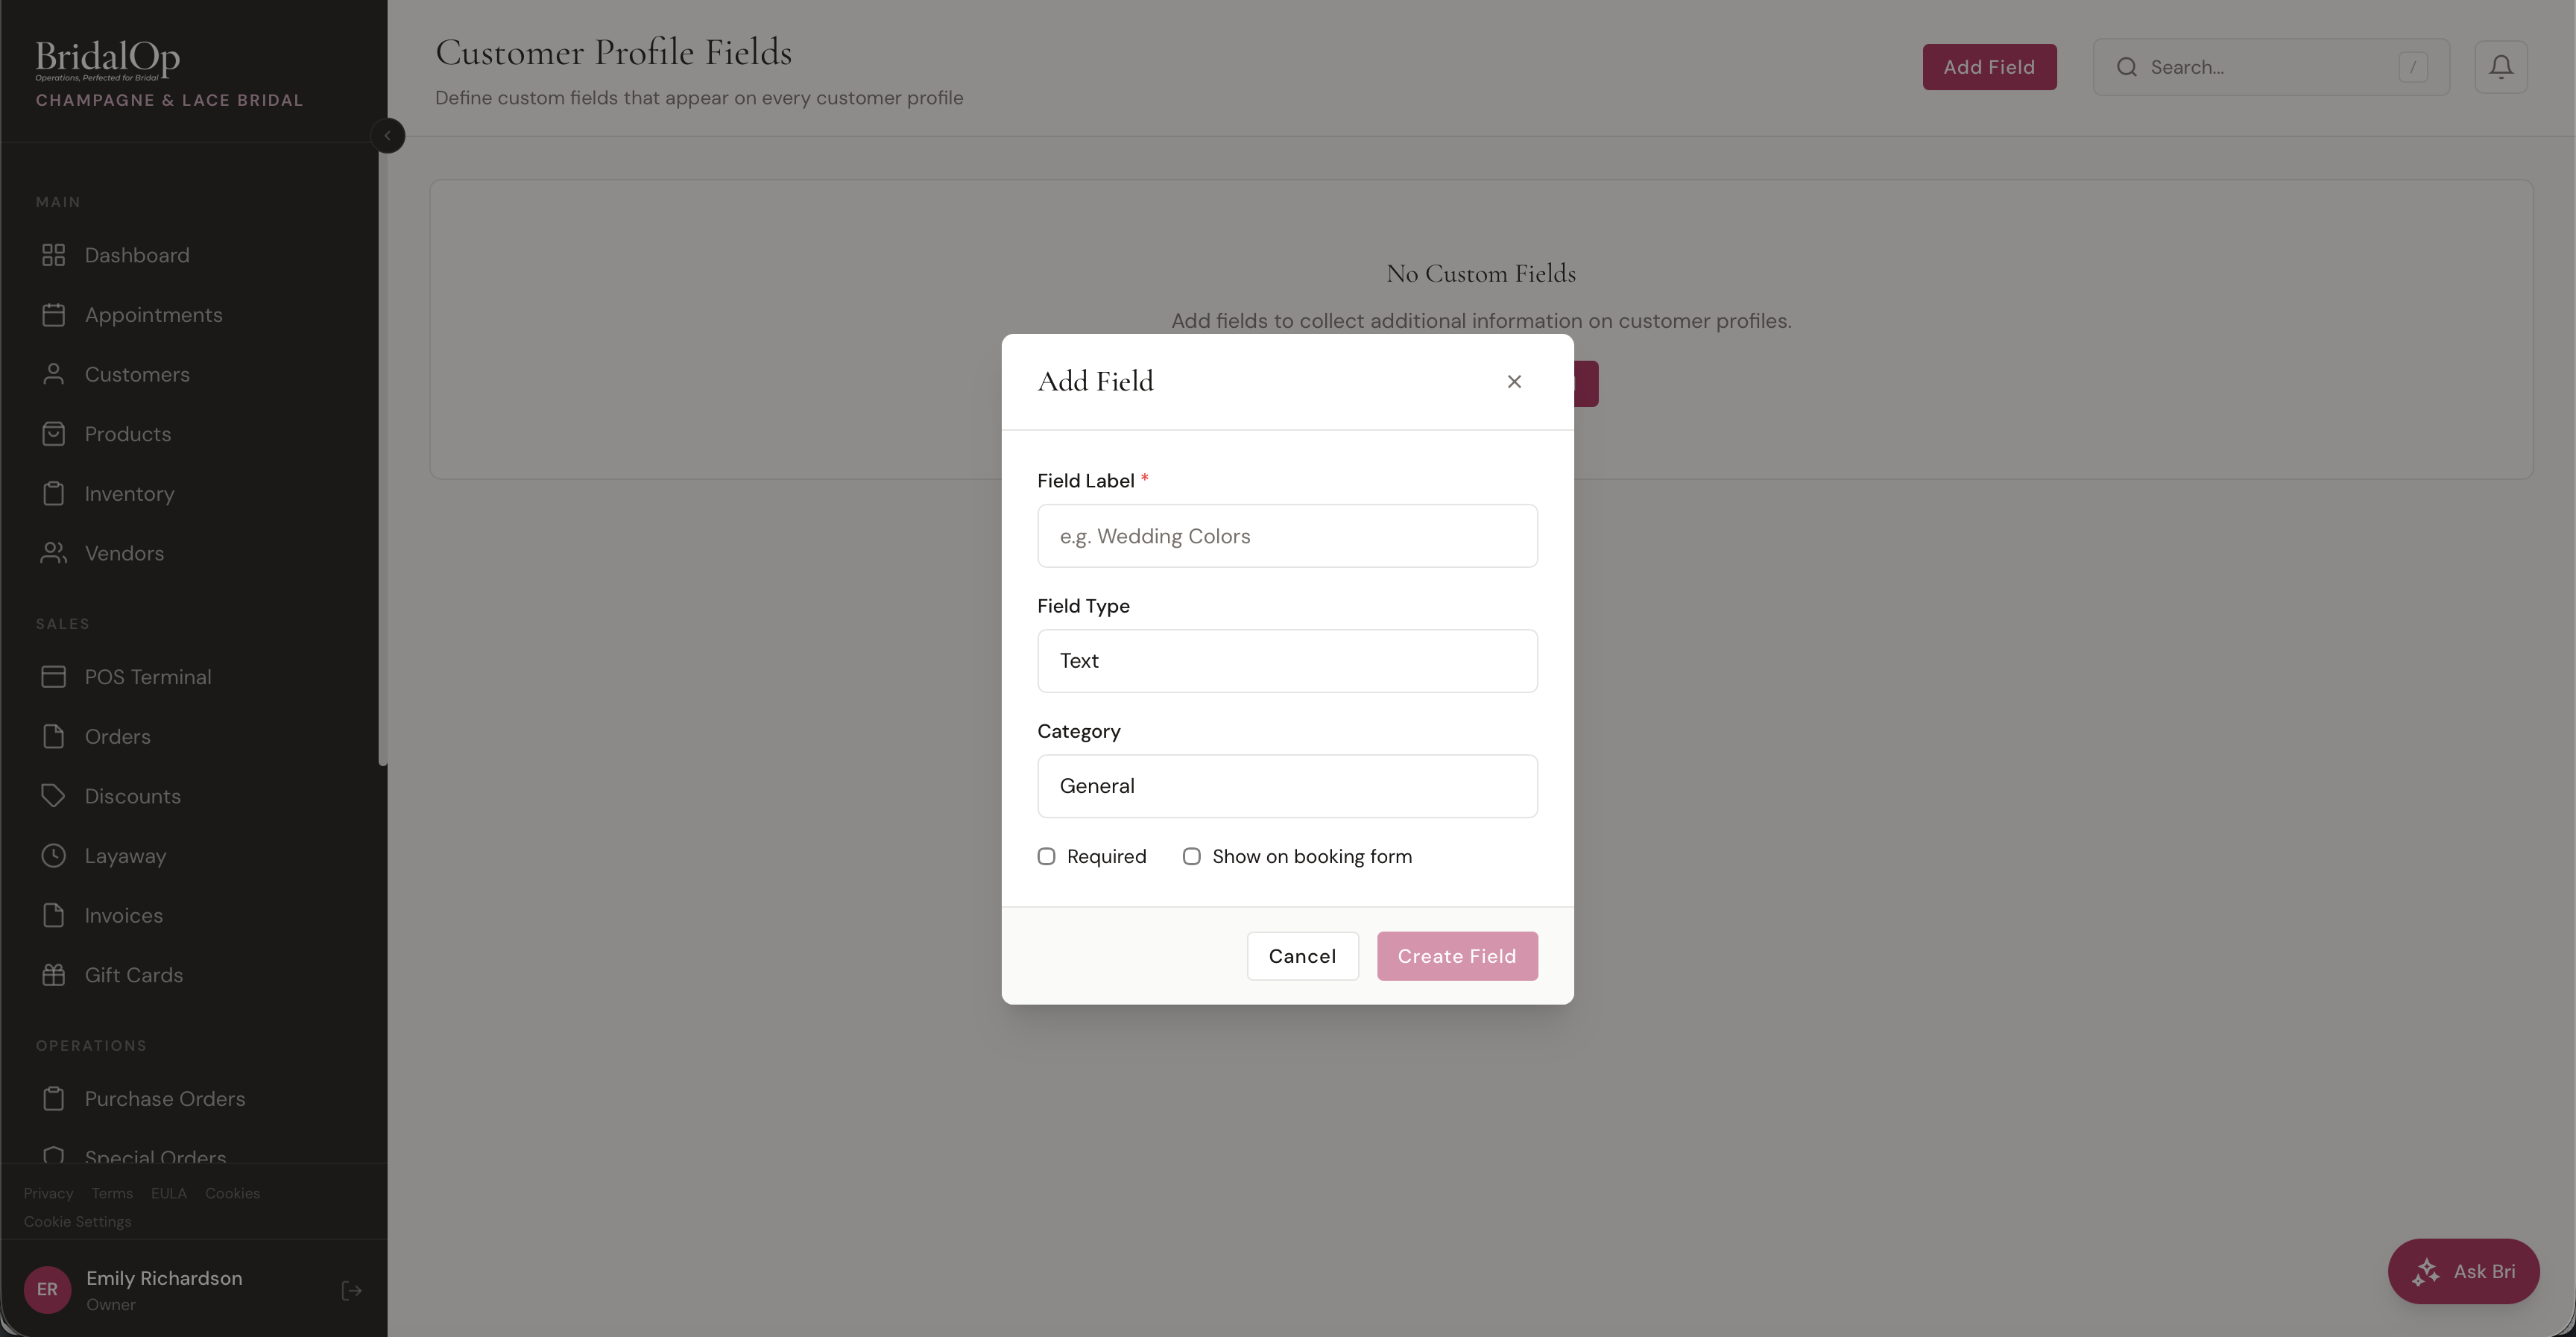
| Field | Required | Description |
|---|---|---|
| Field Label | Yes | The label shown on the customer profile (e.g., "Wedding Colors") |
| Field Type | Yes | Type of input — Text, Textarea, Number, Select, Checkbox, Date, etc. |
| Category | Yes | Groups the field under a heading on the profile (e.g., "Wedding Details") |
| Required | No | If checked, staff must fill in the field to save the customer |
| Show on booking form | No | If checked, the field also appears on the public booking form so customers can answer during online booking |
Categories
Categories create visual groups on the customer profile tab. You can reuse an existing category or create a new one. Common examples:
- Wedding Details — wedding colors, theme, venue
- Dress Preferences — style, length, fabric notes
- Allergies / Sensitivities — fabric allergies, fragrance sensitivities
Each category becomes a card on the customer's Profile tab with all its fields grouped together.
Where Custom Fields Appear
Once added, custom fields show up on the customer's Profile tab (separate from the Details tab).
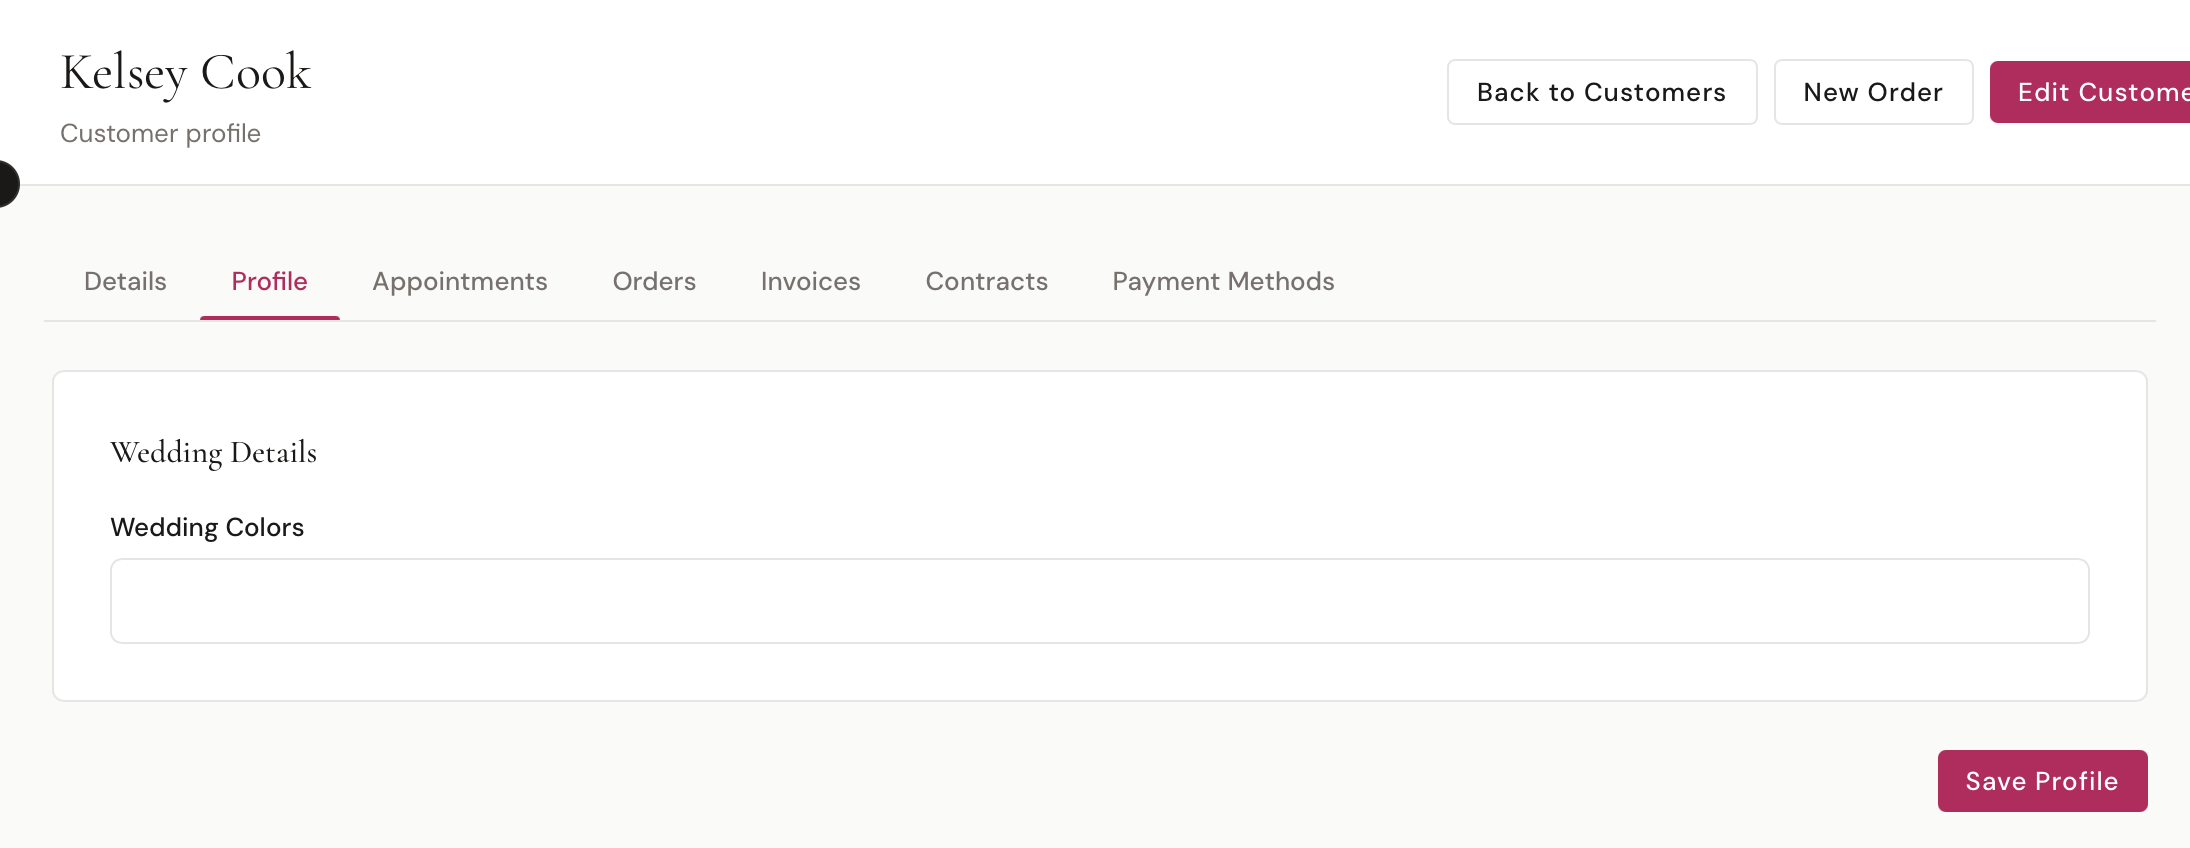
Fields are grouped by category. Staff can enter or update values on the customer's profile page by clicking the Profile tab and typing into the fields, then clicking Save Profile.
On the Booking Form
If you check "Show on booking form" when creating a field, it also appears on your public booking portal. Customers can fill it in when booking their appointment online, and the value is automatically saved to their profile.
This is different from custom booking questions (configured in Booking Settings) — booking questions are tied to individual appointments, while customer fields are permanent profile data that persists across all their appointments.
Conditions
You can set conditions on a custom field so it only appears on customer profiles that match specific criteria. Without conditions, the field shows for everyone.
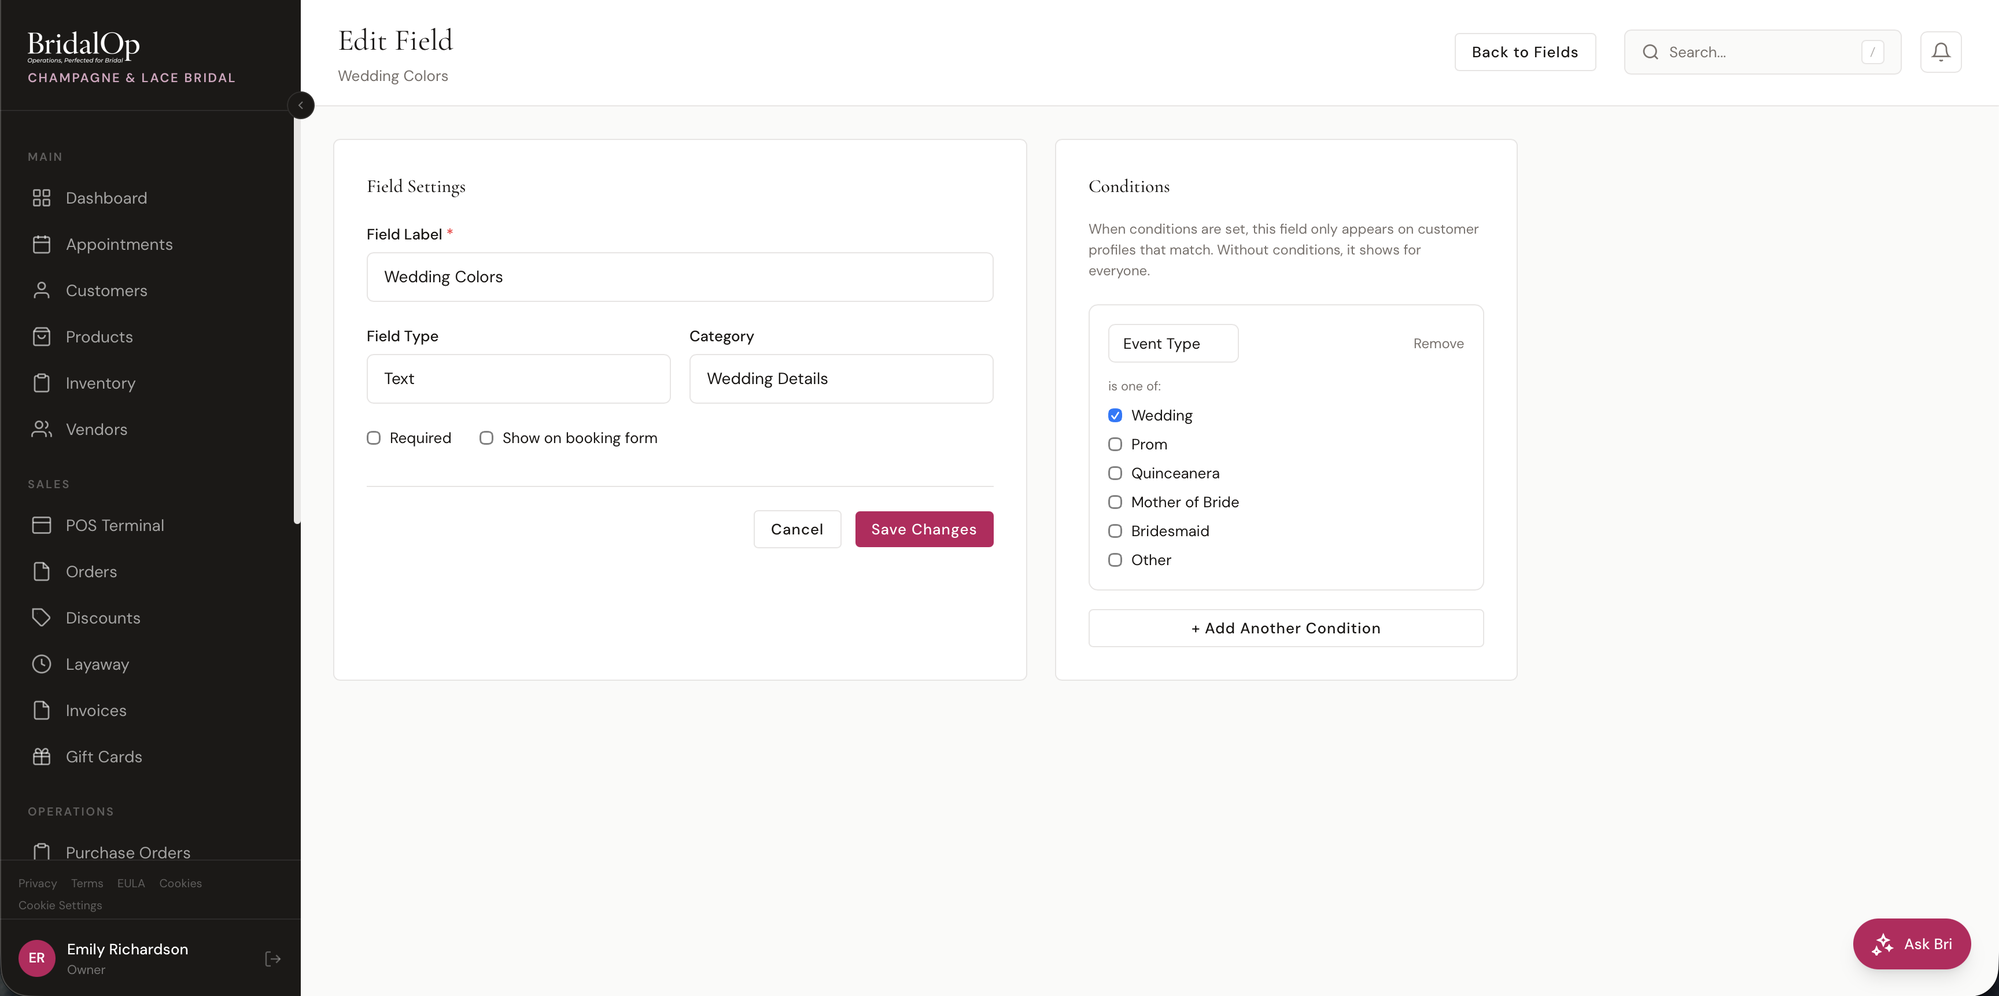
For example, you might want a "Wedding Colors" field to only appear for customers whose Event Type is Wedding — not for Prom or Quinceañera customers.
To add a condition, click + Add Another Condition on the field's edit page. Select the field to match against — currently supports Event Type and Source — then check which values should trigger this field to appear (e.g., Wedding). When you have multiple conditions, use the AND/OR toggle to control whether all conditions must match (AND) or any one of them (OR).
Fields with conditions show a "Conditional" badge in the fields list so you can see at a glance which ones are filtered.
Click Remove on a condition to delete it.
Editing and Deleting Fields
Click any existing field in the list to open the full edit page where you can update the label, category, required status, booking form visibility, and conditions. You can also delete fields — this removes the field definition but existing customer data for that field is preserved until you create a new field with the same key.